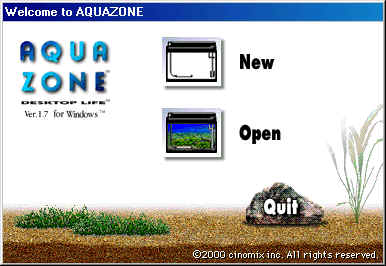
 You can see that the font has changed, as well as the version number. Now, click on new...
Understanding Japanese aquazone
Taking into account the fact that most of you already frequently use aquazone, the majority of you are probably handling our Japanese updates quite well. However, there are some who may require a little help and for this reason I have setup these few pages just to help you through it. Below you will find screenshots of the various windows and menus as they are displayed when the Japanese updates are installed, with an explanation with each of them... REMEMBER... This is only for those WITHOUT Japanese character support installed...
Let's start with the actual startup screen, those who ever actually look at the start up screen will notice the difference already... I am going to word all of this as a sort of tutorial for creating a fish tank and putting the fish in it, this way you'll be able to understand what each button does far better than someone simply telling you about it...
You can see that the font has changed, as well as the version number. Now, click on new...
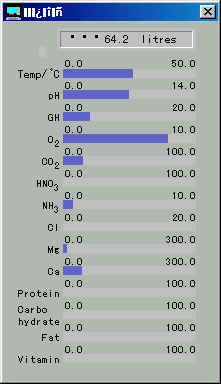
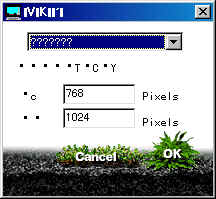 You should see this box. Very different from what we're used to seeing I agree! But it does exactly the same thing as before. On the drop down menu, you'll notice all of the options are question marks. They are easy to understand since all you have to do is select them and you'll see what measurements each is on the pixel measurement bars... For this tutorial, select a simple small tank, exactly the same measurements as I have (refer to pic). Click OK and we can continue...
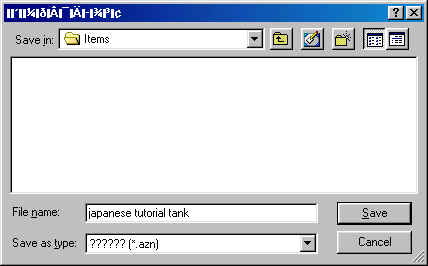 This is where you enter the name of your new tank, please do so now, and then click save....
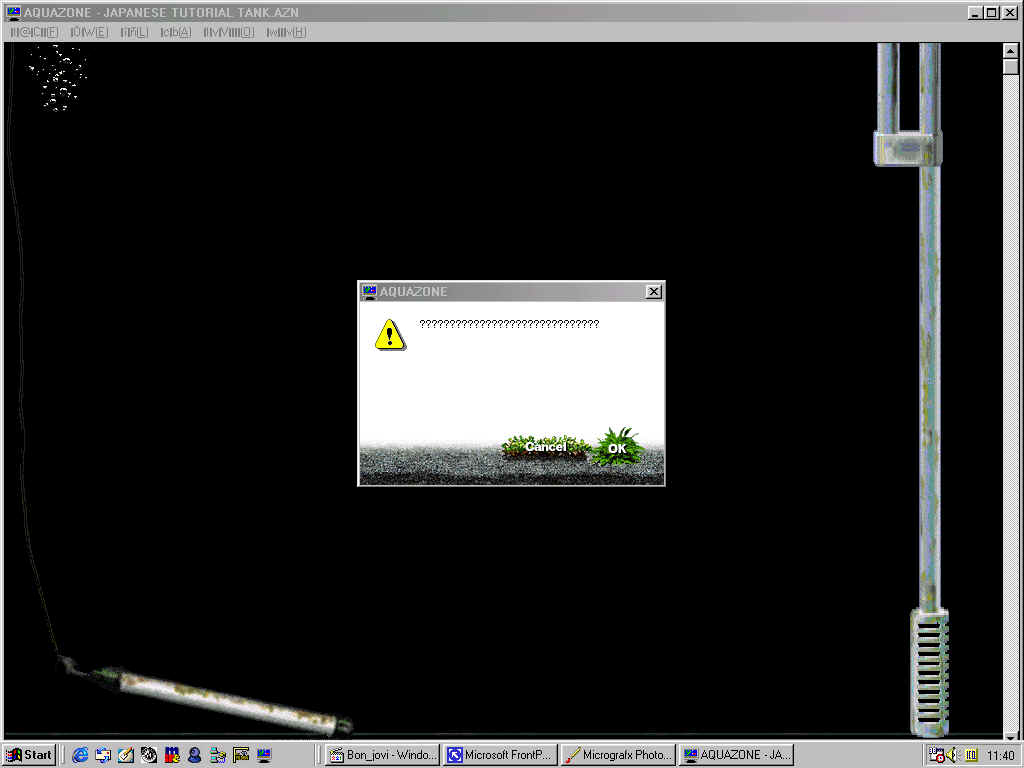
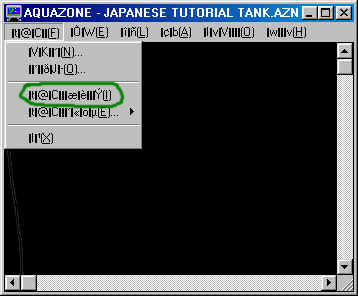
Big picture huh? Hehe... anyway, ignore the fact that I was listening to It's my life.mp3 by Bon Jovi... This popup window looks weird huh? Not to worry, it's just the screen that normally says about adding fish and gravel and stuff... Click ok...
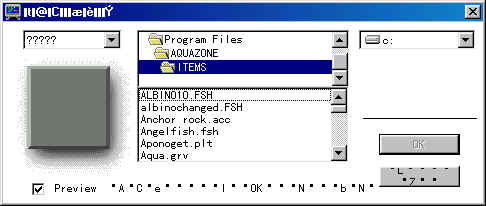 This window looks quite freaky compared to normal, but don't worry... IGNORE all of those horrible characters and you'll quickly realize their functions. It is very useful to have the preview button checked at this point... On the drop down menu, you'll again notice the question marks... Currently selected is 'any'... drop the menu down, and click each of them, you'll notice the file name in the items box change for each menu selection, just as it did normally... Click each of the options until you get to the point where only the accessory (.acc) files are displayed... Select the anchor rock, then click ok. You'll now see a rock appear in your tank, click the cancel button to go to the tank itself now... just doing that one rock should have showed you exactly how to use those menus...
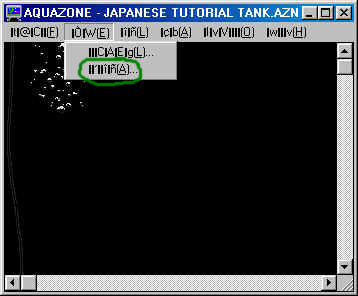
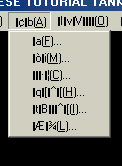
![]() Ok, this is your new menu! Looks horrible, but does the same things as before. You'll notice something about those menu bars, at the end of each Japanese word, is an English letter in brackets. These are very useful, you can see their meanings. at the end of the first one, is the letter (F). This is the 'File' menu. At the end of the second one, there is an (E), this is for changing the layout and speed of the tank... (L) is for the species/accessory/plant identification options.(O) is for the various option such as feeding, filter cleaning, changing water, lights on and off etc etc... (H) is that general help thing about aquazone that no-one ever really opens. First off, we're going to speed up the tank and add chlorine medication to it... My measurements will by no means be accurate, so if you're planning on using this as a permanent fish home, work out the correct medication amounts to enter. Click on the menu with the (E) at the end... You'll see two options...
Ok, this is your new menu! Looks horrible, but does the same things as before. You'll notice something about those menu bars, at the end of each Japanese word, is an English letter in brackets. These are very useful, you can see their meanings. at the end of the first one, is the letter (F). This is the 'File' menu. At the end of the second one, there is an (E), this is for changing the layout and speed of the tank... (L) is for the species/accessory/plant identification options.(O) is for the various option such as feeding, filter cleaning, changing water, lights on and off etc etc... (H) is that general help thing about aquazone that no-one ever really opens. First off, we're going to speed up the tank and add chlorine medication to it... My measurements will by no means be accurate, so if you're planning on using this as a permanent fish home, work out the correct medication amounts to enter. Click on the menu with the (E) at the end... You'll see two options...
 The circled option is for changing the tanks speed, please click it...
 You should now be seeing this, although the text is all messed up, you are still able to see the most important buttons there. These are, OK, Cancel and the scroll bar itself. Moving the scroll bar all the way until it hits 100, then click ok...
Next, I want to add the medication, the reason I sped the tank up is because the medication takes effect faster and you don't have to wait as long. Go to the (A) menu, and click the option that has (M) at the end of it, it is the second option down from the top.
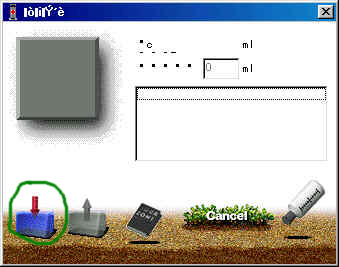 The circled button is what you should now press. This will bring up a list of meds to choose from, select the chlorine medication and click ok lots of times to add more of the medication, then click the button underneath ok... This will bring you back to the medication screen, which now has chlorine listed. Click once on chlorine med, and then go the small box near the top, which you should enter '20' into... look at screenshot below....

Now click the bottle/dropper on the bottom right of the med screen, this will add your medication to the tank... Now go to the (L) menu and then select the option near the bottom, (W). You can watch as your chlorine quickly disappears.
 See? Now with that done, go back to the menu where we selected tank speed from, you been paying attention? Click on the speed setting option again, and this time make the speed go back to 1... then close the window. You will now be back at your tank, with your lonely anchor rock. We're now going to add just one plant to go with this. Go to the file menu (F) and look at the list of options, there is one there that ends with (I)... see screenshot below...
 Click on that item and you should see a familiar window, we're back at the items screen. Do the same as before with the drop down menu, and carry on until you see the plant files (.plt). Select common eel grass, and click ok...
 Select the large eel grass, and then click the add plant button next to close button.
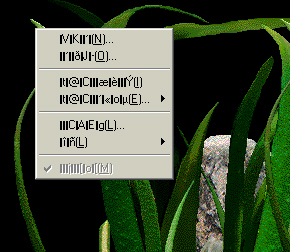
Now we will change the layout so that the rock and the plant are at the back of the tank. Right click (right mouse button) anywhere within the actual aquarium view, you'll see this menu:
Ok? You'll notice that the 5th option down from the top ends with an (L), click this, as it means Layout... Then, lay your aquarium as you would in the ordinary English game and then click ok.
You'll now be retuned back to your aquarium. In this tutorial I have showed the simple basics of making an aquarium, now we'll add just two fish, and feed them. We'll also give them a day time and night time.
Right click on the main aquarium as we did before, but this time choose the 3rd option down, it is ending with (I). This will take us back to the items selection screen as with the plants and accessories. Find the drop down selection for fish... Select the black molly and add two fish from that file.
Now, we're going to go back to the file menus again. Go to the menu bar, and find the menu ending with (A).
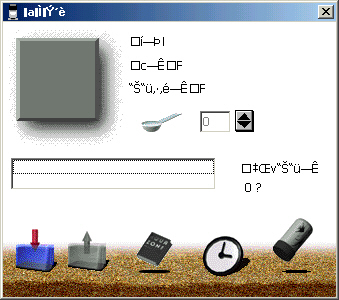
 Can you see the one we're going to press? It is the one ending with (F) meaning food. Click it, and then you'll be sent to the food menu.
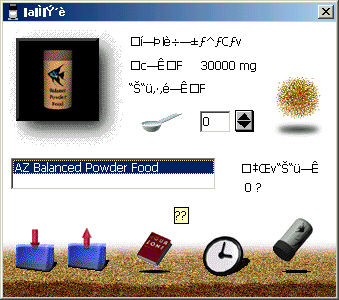
 Ok? Now, click the bottom left icon just like with the med screen, and select the powered fish food... click ok a few times, then click the button under ok.
 Now we've got this done, it should seem to make sense to you all, anyone reading this has probably used the English version and know what to do next. You see those little up and down buttons next to the graphic of a spoon? Click the up button so that it says 4, then, click the clock at the bottom.
 Click the switch so that it if turned on, then look at the little time selection windows with up and down arrows. Change the one underneath the top two, to 6, ignore the top ones, they just time how long before the next feeding. Once you've changed the bottom one to 6, it will feed the fish every 6 hours... click ok, and you'll notice it feed the fish. Close the food window and go back to the aquarium, we have a black background, and black fish, so we cant see them. Right click on the tank again, and select the items box as before... Search for the backgrounds (.bmp) and then choose emerald. Click ok, then the button under ok. You'll now be able to see your fish.
 OK? Now, one of the last things to do is change the light settings. Go back to the attend menu (ending with A) on menu bar... choose the very bottom one.
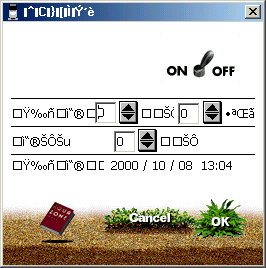
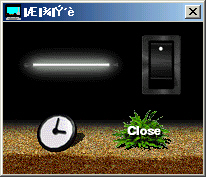 Click the switch which is on the top right, this will turn the light off, this was just as an example, so switch it back on... now, click the little clock on the bottom left. You'll see this:
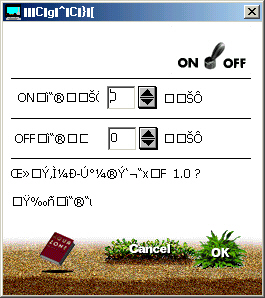 Click the ON switch. You'll see two more of those scroll bars, one has ON to the left of it, the other has OFF to the left of it. On the on scroll bar, please press the up button up to 8, and the off scroll bar up to 10. This will make it have a day light cycle of 8 hours, and night time of 10 hours.
What you have just done is create a basic tank, that should show you the ins and outs of the aquazone program. To be honest, most of you wouldn't need something like this, I played the Japanese version and it only took about 1 hour until I was using it purely from instinct, I was hitting buttons without looking at their labels and getting it right each time. That is why I will not be doing any other functions, it is strongly recommended that you experiment yourself from now and if you REALLY get stuck you are welcome to e-mail me at the bottom of the page... I hope this did help anyone that really was stuck with it... If not, then , well.... I'm unemployed so I don't care about time wasting! :-)
See you all on alt.games.aquazone and the AZ legacy chat room and bbs!
Dave